If you are wanting a cute signature for the bottom of your posts here's a quick and easy tutorial on how to add one to your blog!
 You will need an image that has your signature. I use Photoshop to create mine. I know there are other programs, such as Microsoft paint. You'll want the image to be about 100x50 pixels. The size can vary it's really up to you and what you want. You can also add a cute image like I did here!
- Next you'll need to up load the image to the internet. You can do this by using Photobucket, Flickr, Picasa or you can do as I did, and put it in a post right here on blogger! You will need to copy the URL address of the image and paste it into the code below.
- Now you will need to copy the following code:
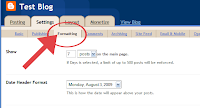
- Now you will need to go into your layout page and click on Settings.
- Once in Settings click on Formatting:

- Scroll down to Post Template and paste the code from above in the box and click the Save Setting button.

(To enlarge images click on the pictures)
- Enjoy your new post signature!


No comments:
Post a Comment